How to 3D-Print Replacement Parts for Pet Feeders: Step-by-Step DIY Guide
Introduction
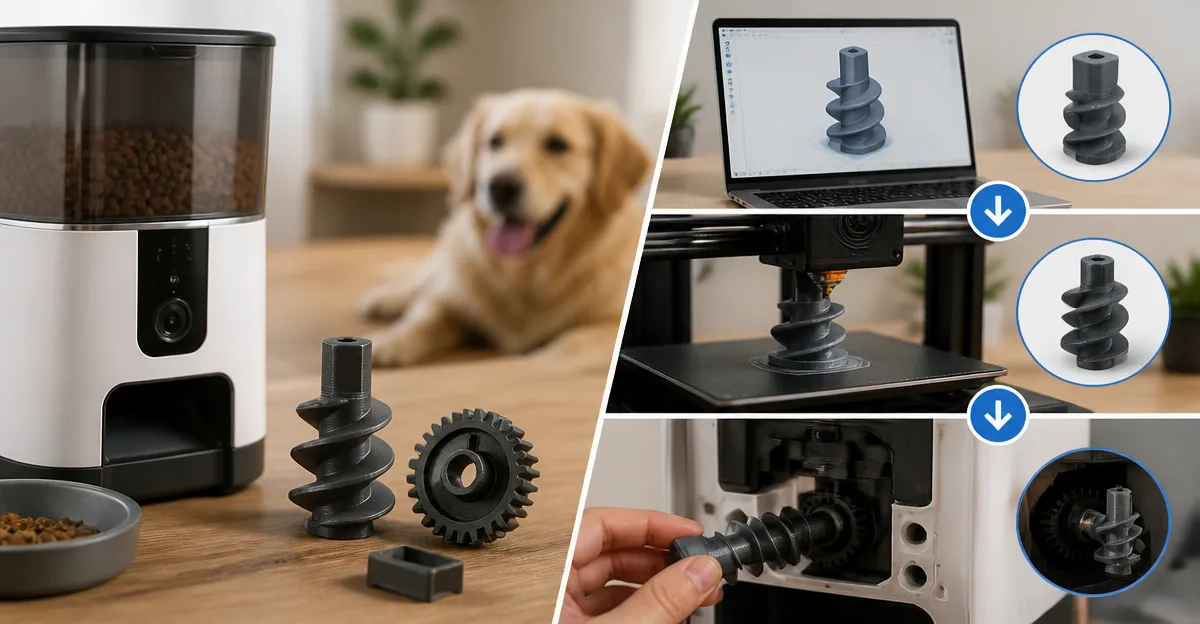
Pet owners often encounter broken trays, worn ice‑pack slots, or cracked bowls in automatic feeders. Replacing these components with 3D‑printed parts extends the life of the device and saves money. This guide explains how to assess the feeder, design a printable model, and install the new part while recommending proven accessories that simplify each stage. By following the instructions, one will achieve a reliable feeding solution that keeps food fresh, portions accurate, and pets satisfied.
What You'll Need
- 3D printer with PLA or PETG filament
- Computer with CAD software (e.g., Tinkercad or Fusion 360)
- Measuring tools: digital caliper, ruler
- Sandpaper or file for post‑processing
- Optional: Cat Mate Replacement Ice Packs – $14.99, 4.7/5 rating
- Optional: Voluas Automatic Cat Feeder – $41.79, 4.4/5 rating
- Optional: Yuposl Automatic Cat Feeder – $33.99, 4.4/5 rating
- Optional: IMIPAW Automatic Cat Feeder – $25.19, 4.4/5 rating
- Optional: IMIPAW Replacement Food Bowl – $12.99, 4.5/5 rating
Step 1: Identify the Broken Component
Begin by unplugging the feeder and removing any food residue. Inspect the unit for cracks, missing tabs, or worn ice‑pack compartments. Common failure points include the plastic carousel slot that holds cooling packs and the stainless‑steel bowl that can become dented. Document the dimensions of the damaged part with a digital caliper; record length, width, depth, and any mounting holes. This measurement stage ensures that the printed replacement will fit precisely.
If the feeder uses ice packs, the Cat Mate Replacement Ice Packs are an ideal reference because they are designed for the C500 model and maintain freshness for up to eight hours. Using the original packs as a template guarantees that the new slot will align with the feeder's cooling system.
Step 2: Create a CAD Model
Open your preferred CAD software and start a new project. Import a sketch of the measured dimensions. For a simple tray, draw a rectangular base, add the measured mounting holes, and extrude to the required thickness (typically 3‑4 mm for PLA). If you are reproducing an ice‑pack holder, include a shallow recess that matches the pack's curvature. Apply a fillet of 1 mm to all edges to reduce stress concentration during printing.
When designing a bowl replacement, consider the stainless‑steel bowl used in the IMIPAW Automatic Cat Feeder. The bowl’s diameter is usually 10 cm; replicate this size and add a lip that snaps into the feeder's latch. Export the model as an STL file ready for slicing.
Step 3: Slice and Print the Part
Load the STL into your slicer. Choose a layer height of 0.2 mm for a balance between strength and speed. For parts that will hold ice packs, select a 20 % infill with a grid pattern to provide rigidity while conserving material. Set the nozzle temperature to 200 °C for PLA or 240 °C for PETG, and a bed temperature of 60 °C. Print the part and allow it to cool completely before removal.
If you own the Voluas Automatic Cat Feeder, you can test the printed component directly in its 4 L food storage compartment. The feeder's removable, cleanable parts make it easy to insert the new piece without disassembling the entire unit.
Step 4: Post‑Process the Print
Remove any support material and sand the edges with 200‑grit paper to eliminate roughness. For components that contact food, wash the part with warm soapy water and rinse thoroughly. Although PLA is food‑safe in most jurisdictions, you may wish to apply a food‑grade epoxy coating for added protection.
The Yuposl Automatic Cat Feeder features a silicone sealing rotor that prevents moisture ingress. When installing a new ice‑pack slot, ensure the rotor aligns perfectly to maintain the seal; otherwise, food may become stale.
Step 5: Install the Replacement Part
Re‑assemble the feeder by positioning the printed component into its original location. Secure any mounting screws using the measurements taken earlier. For bowl replacements, insert the IMIPAW Replacement Food Bowl – a stainless‑steel bowl that eliminates plastic‑related chin acne and is dishwasher safe. The bowl fits snugly into the feeder's tray and locks with a simple twist, as praised by multiple reviewers.
Finally, reload the ice packs (or the new Cat Mate Replacement Ice Packs) and fill the food hopper. Power the feeder on and run a manual dispense cycle to confirm proper operation.At this point, the feeder should resume normal feeding schedules with accurate portions and maintained freshness.
Tips & Pro Tips
- Print test pieces at 100% infill when the part must bear the weight of wet food or ice packs.
- Use PETG instead of PLA for components that will be exposed to moisture, as PETG offers superior chemical resistance.
- Apply a thin layer of silicone grease to moving hinges to reduce wear.
- Store spare ice packs in the freezer; the Cat Mate Replacement Ice Packs freeze quickly and provide up to eight hours of cooling.
- When printing a bowl, consider a slightly larger diameter (1–2 mm) to accommodate thermal expansion without affecting the feeder’s lock mechanism.
Troubleshooting
| Problem | Possible Cause | Solution |
|---|---|---|
| Part does not fit | Incorrect measurements or printer shrinkage | Re‑measure, adjust CAD dimensions by +0.2 mm, and re‑print. |
| Ice pack slot leaks | Seal not aligned with silicone rotor | Ensure the rotor sits flush; add a thin silicone gasket. |
| Food jammed in dispenser | Portion size too large for feeder motor | Reduce portion setting in feeder software; verify that the printed feeding tube has a smooth interior. |
Conclusion
By following this step‑by‑step guide, one can create durable, custom‑fit replacement parts for any automatic pet feeder. The process leverages affordable 3D‑printing technology, precise measurement, and strategic product choices such as the Cat Mate Replacement Ice Packs and the IMIPAW Replacement Food Bowl. The result is a feeder that continues to deliver accurate meals, keep food fresh, and operate quietly, providing peace of mind for pet owners.
Products Mentioned in This Guide
Frequently Asked Questions
What filament is best for printing pet feeder parts?
PLA is easy to print and food‑safe for low‑heat parts, while PETG offers higher durability and heat resistance for trays and ice‑pack slots.
Do I need a professional CAD program to design replacement parts?
No; free tools like Tinkercad work for simple components, and Fusion 360 provides advanced features if you need more precision.
How can I ensure a 3D‑printed part fits my feeder exactly?
Measure the original piece with a digital caliper, model those dimensions in CAD, and print a test piece to verify tolerance before final printing.
Is post‑processing necessary for 3D‑printed feeder components?
Yes; light sanding or filing removes layer lines and improves fit, and a food‑safe sealant can add extra protection.
Can I use 3D‑printed parts in any automatic pet feeder?
Most feeders accept custom‑printed trays or slots, but check the feeder’s dimensions and material compatibility to avoid interference with moving mechanisms.